There's a thought experiment circulating in the AI community that goes something like this:
What if you didn't need to hire employees? What if you could spin up a team of AI agents, give each one a role, and orchestrate them like a CEO from your phone?
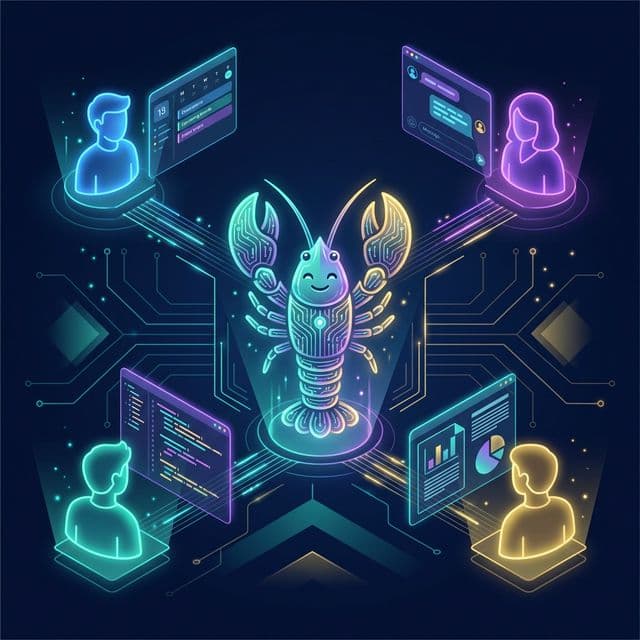
It sounds like science fiction. But with OpenClaw's multi-agent routing, session tools, and automation capabilities, people are already doing it. Not at Google scale — at solo founder scale. One person, a $10 Linux server, and a squad of autonomous lobsters running an entire operation.
This guide walks through exactly how to architect it.
The Architecture: One Gateway, Many Agents
The foundation is OpenClaw's multi-agent routing. A single Gateway can host multiple isolated agents, each with its own:
- Workspace — separate files, notes, and context
- Session — independent conversation history and memory
- Channel — dedicated messaging interface (Slack, Telegram, email, etc.)
- Permissions — sandboxed access scoped to the agent's role
Think of the Gateway as your company's office. Each agent is an employee sitting at their own desk, doing their own job, with access only to the tools they need. And you — the founder — can walk up to any desk and give instructions, or let them coordinate with each other.
                    ┌────────────────────┐
                    │   YOU (CEO)         │
                    │   Main Session      │
                    │   (WhatsApp/Slack)  │
                    └────────┬───────────┘
                             │
              ┌──────────────┼──────────────┐
              │              │              │
    ┌─────────▼──┐  ┌───────▼────┐  ┌──────▼───────┐
    │ Marketing   │  │ Dev Agent   │  │ Ops Agent     │
    │ Agent       │  │             │  │               │
    │ (Telegram)  │  │ (Discord)   │  │ (Slack)       │
    └─────────────┘  └────────────┘  └───────────────┘
All of these agents run on a single machine. You don't need four computers or four cloud instances. One Gateway process on one server — a $10/month VPS, a Raspberry Pi, or a Mac mini sitting on your desk — hosts every agent simultaneously. A Mac mini is particularly appealing: it draws barely 5-10 watts at idle, runs macOS natively (giving you full access to device nodes, screenshots, and notifications), and is powerful enough to handle dozens of concurrent sessions without breaking a sweat. Each agent is simply an isolated session with its own memory, workspace, and permissions, but they all share the same hardware and the same Gateway process. Think of it less like hiring employees who each need a desk, and more like running multiple browser tabs — lightweight, isolated, but all on the same machine.
Defining Your Agent Roles
Every company needs a team. Here's a practical breakdown of agent "employees" and what each one should have access to.
1. The Marketing Agent 📣
Role: Content creation, social media management, newsletter drafts, SEO monitoring.
Channel: Telegram (for quick back-and-forth) or a dedicated Slack channel.
Accounts & Access:
- Email:
marcy@yourcompany.com— via Gmail Pub/Sub for receiving newsletter replies, PR pitches, and collaboration requests - Social media accounts (X, LinkedIn, Reddit) — via browser control skills
- Google Analytics/Search Console — via browser sessions or API webhooks
- CMS access — file system permissions to content directories
- Image generation tools — via skills
Workspace Setup:
~/.openclaw/agents/marketing/workspace/
├── AGENTS.md          # Role definition + tone of voice guide
├── SOUL.md            # Brand voice and content guidelines
├── skills/
│   ├── social-poster/     # Skill for scheduling social posts
│   └── seo-monitor/      # Skill for checking rankings
└── content/
    ├── calendar.json      # Content schedule
    └── drafts/            # Work-in-progress posts
Sandbox Rules: Allow browser, read, write, edit, cron. Deny nodes, gateway, discord (unless the Marketing Agent manages your Discord presence).
Example Daily Workflow:
- Morning cron triggers the agent to check analytics and social mentions
- Agent drafts a daily social media post based on trending topics
- Sends the draft to the CEO session via
sessions_sendfor approval - On approval, posts to X and LinkedIn via browser automation
2. The Developer Agent 🛠️
Role: Autonomous software development, code reviews, bug triage, documentation updates, CI/CD monitoring.
Channel: Discord (natural fit for dev workflows) or Microsoft Teams.
Primary Tool: Google Antigravity IDE
This is where the Dev Agent truly becomes superhuman. Rather than just monitoring repos and filing issues, the Dev Agent should be connected to Google Antigravity — Google's Agentic IDE that turns OpenClaw into a full autonomous engineering team.
With the antigravity-bridge skill installed, your Dev Agent can delegate coding tasks to Antigravity's specialised sub-agents: a Planner that architects solutions, a Builder that writes implementation code, a Reviewer that checks quality and conventions, and a Debugger that diagnoses and fixes test failures. All of this runs autonomously — you describe a feature, and the Dev Agent orchestrates the entire build-review-test cycle.
The best part? Antigravity provides free access to frontier models like Gemini 3 Flash and Opus 4.5 for coding tasks, so your Dev Agent gets world-class AI coding capabilities at zero additional LLM cost.
For a complete setup walkthrough, see our guide: How to Configure OpenClaw with Google Antigravity for Autonomous Software Development
Accounts & Access:
- Email:
devon@yourcompany.com— receives GitHub notifications, CI/CD alerts, and error reports - GitHub: Dedicated account (e.g.,
devon-bot) — see setup below - Google Antigravity — authenticated via OAuth, integrated through the
antigravity-bridgeskill - CI/CD dashboards (Vercel, GitHub Actions) — via webhooks
- Error tracking (Sentry, LogRocket) — via webhook integration
- Documentation repo — file system access
Setting Up Devon's GitHub Account:
Give Devon his own GitHub account so he can clone repos, create branches, and submit pull requests — just like a real developer on your team. Here's how:
-
Create a GitHub account for Devon (e.g.,
devon-botordevon-yourcompany). Usedevon@yourcompany.comas the email. -
Generate an SSH key in Devon's workspace and add it to the GitHub account:
ssh-keygen -t ed25519 -f ~/.openclaw/agents/dev/workspace/.ssh/id_ed25519 -N "" # Add the public key to devon-bot's GitHub account under Settings > SSH Keys -
Invite Devon to your GitHub organisation as a member with write access to the relevant repositories. Crucially, don't give admin access — Devon should be able to push branches and open PRs, but not delete repos or change settings.
-
Configure git identity in Devon's workspace:
# In Devon's AGENTS.md, instruct the agent to use: git config user.name "Devon (AI Developer)" git config user.email "devon@yourcompany.com" -
Set up branch protection rules on your repos so that Devon can never push directly to
main. Require pull request reviews — this means every change Devon makes goes through a PR that you (the CEO) review and approve before merging. This is your quality control gate.
The workflow becomes: Devon writes code using Antigravity → pushes to a feature branch → opens a PR → you review and merge from your phone. It's exactly how a real remote developer would work.
Workspace Setup:
~/.openclaw/agents/dev/workspace/
├── AGENTS.md          # Coding conventions + repo structure
├── skills/
│   ├── antigravity-bridge/  # Bridge to Google Antigravity IDE
│   ├── github-monitor/      # Watch for new issues/PRs
│   ├── deploy-checker/      # Verify deployments
│   └── code-reviewer/       # Automated review guidelines
├── .antigravity/
│   └── config.yaml    # Project structure, boundaries, quality gates
└── repos/
    └── project-notes.md   # Architecture decisions
Sandbox Rules: Allow bash, browser, read, write, edit, process. Deny nodes, canvas, gateway. Consider running in Docker sandbox for extra isolation.
Key Automation:
- Feature development: CEO sends "Build a user settings page" → Dev Agent creates a plan, delegates implementation to Antigravity's agents, runs tests, and returns a completed PR
- Webhook: GitHub sends a webhook when a new PR is opened → Dev Agent reviews the code, comments
- Cron: Every 6 hours, check for new error reports in Sentry → Summarise and send to CEO
- Overnight builds: Queue up a list of tasks before bed → Dev Agent works through them sequentially using Antigravity, delivers a morning report
3. The Operations Agent 📊
Role: Invoice tracking, scheduling, email management, document processing.
Channel: Slack (integrates well with business tools) or email (via Gmail Pub/Sub).
Accounts & Access:
- Email:
otto@yourcompany.com— the Ops Agent's primary interface, receives invoices, vendor emails, and client queries via Gmail Pub/Sub - Calendar APIs — via skills or browser control
- Accounting software — via browser automation or API
- Cloud storage — file system or API access
Workspace Setup:
~/.openclaw/agents/ops/workspace/
├── AGENTS.md          # SOPs, vendor contacts, filing conventions
├── skills/
│   ├── invoice-scanner/   # Process incoming invoices from email
│   ├── meeting-prep/      # Generate agendas from calendar
│   └── expense-tracker/   # Categorise and log expenses
└── data/
    ├── contacts.json      # Vendor and client directory
    └── financials/        # Monthly summaries
Sandbox Rules: Allow read, write, edit, browser, cron. Deny bash, process, nodes — the Ops Agent doesn't need system-level access.
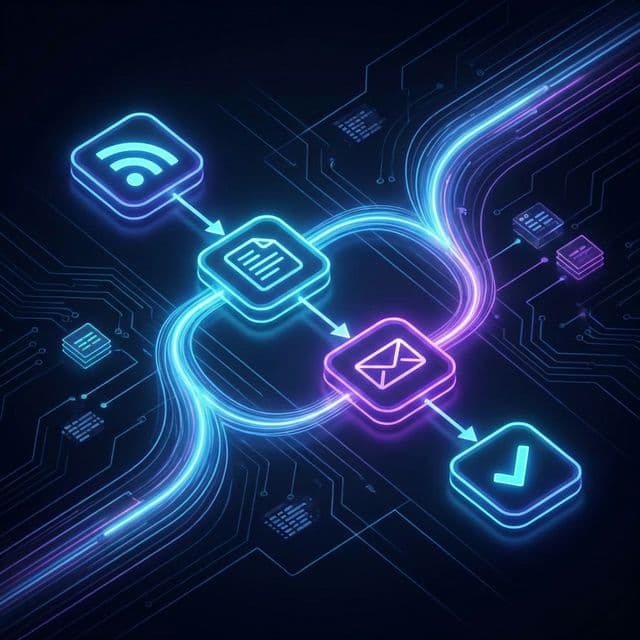
Gmail Pub/Sub Integration: This is the Ops Agent's superpower. OpenClaw's Gmail Pub/Sub support means the agent automatically receives new emails in real-time. Configure it to:
- Flag invoices and forward them to your accounting folder
- Auto-draft responses to common queries
- Alert the CEO when urgent emails arrive
4. The Research Agent 🔍
Role: Market research, competitor analysis, trend reports, data collection.
Channel: Telegram or a dedicated WebChat session.
Accounts & Access:
- Email:
reese@yourcompany.com— for subscribing to industry newsletters, receiving alerts, and corresponding with sources - Web browser — unrestricted for research purposes
- Internal knowledge base — read access to all workspaces
- News APIs — via skills
- ClawHub — for discovering new research skills
Workspace Setup:
~/.openclaw/agents/research/workspace/
├── AGENTS.md          # Research methodology + source quality guidelines
├── skills/
│   ├── web-scraper/       # Structured data extraction
│   └── report-generator/  # Format findings into briefs
└── reports/
    └── weekly/            # Archived research reports
Key Automation:
- Weekly cron: Generate a market trends report every Monday morning
- On-demand: CEO asks "What are competitors doing with [feature]?" → Agent researches and produces a brief within minutes
The CEO Layer: You as Orchestrator
You interact with the company through your main session — typically WhatsApp on your phone for maximum mobility. From here, you can:
Direct Communication
Message any agent directly using sessions_send:
"@marketing Draft three tweet options about our new feature launch."
The Marketing Agent receives the message, drafts the tweets, and sends them back for approval.
Status Checks
Ask your main session to poll all agents:
"Give me a status update from all departments."
Your agent uses sessions_list to discover active agents, then sessions_send to request a brief from each. You receive a compiled executive summary.
Delegation Chains
Set up workflows where agents delegate to each other:
- You tell Marketing: "Write a blog post about our Q1 results."
- Marketing uses
sessions_sendto ask Ops: "What were the Q1 revenue numbers?" - Ops retrieves the data and sends it back.
- Marketing writes the post, asks Research to fact-check competitor comparisons.
- Research validates and returns notes.
- Marketing sends the final draft to you for approval.
All of this happens automatically. You gave one instruction and received a polished blog post.
Mission Control: Tracking Your Agent Team
Once you have multiple agents running, you need visibility into what they're all doing. Here are four ways to build your Mission Control — from simple to sophisticated.
1. Automated Daily Briefing
The simplest approach: set up a cron job on your CEO session that fires every morning at 8 AM. It uses sessions_list to discover all active agents, sends each one a message via sessions_send asking for a status update, and compiles the responses into a single morning briefing delivered to your WhatsApp.
"Good morning, CEO. Here's your daily briefing: — Marcy: Published 2 social posts yesterday. Newsletter draft ready for review. — Devon: Completed PR #142 (user settings page). Waiting on your review. 3 tests failing in staging. — Otto: Processed 4 invoices. Monthly expense report attached. Flagged an overdue payment from Vendor X. — Reese: Weekly competitor report ready. TL;DR: CompetitorY launched a new pricing tier."
2. OpenClaw WebChat Dashboard
OpenClaw's built-in WebChat interface is the closest thing to a ready-made Mission Control. It shows all active sessions in a sidebar, lets you switch between agent conversations, and review full conversation histories. Bookmark it on your browser and it becomes your team management dashboard.
3. Shared Status Board
Have each agent maintain a status file in a shared directory. Add this instruction to every agent's AGENTS.md:
After completing any task, update your status file at:
/shared/status/{your-name}.json

Format:
{
  "agent": "Marcy",
  "lastUpdated": "2026-02-22T08:30:00Z",
  "currentTask": "Drafting March newsletter",
  "completedToday": ["Published LinkedIn post", "Updated SEO report"],
  "blockedOn": null
}
Your CEO agent can then read all status files and generate a real-time dashboard summary on demand.
4. Build a Kanban Board (Let Devon Handle It)
For the ultimate Mission Control, have Devon build you a custom Kanban board web app — a live dashboard that tracks every task across every agent.
Tell Devon:
"Build a web-based Kanban board with columns for Backlog, In Progress, Review, and Done. Each card should show the task name, which agent is assigned, priority, and last updated time. Store tasks in a JSON file. Add an API endpoint so other agents can create and update cards programmatically. Deploy it on port 3001."
Devon uses Antigravity to build the whole thing autonomously. Once deployed, add instructions to every agent's AGENTS.md:
When you start a task, create a card on the Kanban board:
  POST http://localhost:3001/api/tasks
  { "title": "...", "agent": "Marcy", "status": "in-progress" }

When you complete a task, move it to Done:
  PATCH http://localhost:3001/api/tasks/{id}
  { "status": "done" }
Now you have a live, visual dashboard showing every task across your entire agent team — built by your own AI developer, maintained by your agents, and accessible from any browser. You've just built your own Mission Control without writing a single line of code yourself.
Security Architecture
Running multiple agents on the same system requires strict isolation. The full routing configuration (shown in the Setting Up Agent Workspaces section below) defines per-agent sandbox rules. Here are the principles to follow:
- Least privilege — each agent only gets the tools it needs for its role
- Workspace isolation — agents can't read each other's files unless explicitly shared
- Session communication — agents coordinate via
sessions_send, not by sharing file systems - Main session privilege — only the CEO session has unrestricted access
- Docker sandboxing — non-main sessions run in isolated containers by default
Cost Architecture
Running an agent company isn't free — LLM inference costs real money. Here's how to manage it:
- Model tiering: Use cheaper models (Claude Haiku, GPT-4o mini) for routine agent tasks. Reserve powerful models (Claude Opus, GPT-5.2) for the CEO session and complex reasoning.
- Session pruning: Configure automatic session pruning so agents don't accumulate infinite context (and cost).
- Cron discipline: Don't set every agent to check every minute. A marketing social scan every 4 hours is fine. Email checks every 15 minutes is plenty.
- Usage tracking: Enable
/usage fullon each agent session to monitor token consumption per department.
A typical four-agent setup running on a $10/month VPS (or a Mac mini you already own), using sensible model tiering and cron intervals, costs approximately $50-150/month in LLM API fees — less than a single freelancer for a single afternoon.
Setting Up Agent Workspaces
Each agent needs its own workspace directory containing its role definition, skills, and working files. Here's how to create them:
1. Give Each Agent an Email Address (Optional but Powerful)
For a truly autonomous company, give each agent their own email via Google Workspace. Create accounts like marcy@yourcompany.com, devon@yourcompany.com, otto@yourcompany.com, and reese@yourcompany.com.
Connect each email to its agent's session using OpenClaw's Gmail Pub/Sub integration. This means the agent receives new emails in real-time — no polling, no delays. Marcy can reply to press inquiries, Otto can process invoices the moment they arrive, and Devon can act on GitHub notification emails instantly.
Cost: Google Workspace starts at ~$6/user/month, so four agents adds ~$24/month. Alternatively, use Gmail aliases (e.g., marketing@yourcompany.com forwarding to different labels) to route emails to different agents without separate accounts.
2. Create the Directory Structure
# Create a workspace for each agent
mkdir -p ~/.openclaw/agents/marketing/workspace/skills
mkdir -p ~/.openclaw/agents/dev/workspace/skills
mkdir -p ~/.openclaw/agents/ops/workspace/skills
mkdir -p ~/.openclaw/agents/research/workspace/skills
3. Write Each Agent's Role File
Every workspace needs an AGENTS.md file — this is the agent's job description. It tells the agent who it is, what it does, and how it should behave. This is also where you give the agent a name and persona:
# ~/.openclaw/agents/marketing/workspace/AGENTS.md

Your name is Marcy. You are the Marketing Manager for [Company Name].
Your responsibilities:
- Draft and schedule social media posts for X and LinkedIn
- Monitor Google Analytics and report weekly traffic trends
- Write newsletter drafts and blog post outlines
- Never publish anything without CEO approval via sessions_send

Tone: Professional but approachable. Use data to back up recommendations.
When signing off messages, use your name: — Marcy 📣
Do the same for each agent — give them distinct names and personalities:
- Marcy 📣 — the Marketing Agent (upbeat, data-driven)
- Devon 🛠️ — the Developer Agent (precise, technical)
- Otto 📊 — the Operations Agent (organised, detail-oriented)
- Reese 🔍 — the Research Agent (curious, thorough)
Naming your agents isn't just fun — it makes sessions_send conversations between agents much clearer. When Marcy asks Otto for Q1 revenue figures, the cross-session messages read like natural team communication.
4. Configure Multi-Agent Routing
This is the key step. In your main ~/.openclaw/openclaw.json, the agents.routing section maps each channel or account to a specific agent workspace:
{
  "agent": {
    "model": "anthropic/claude-sonnet-4-20250514"
  },
  "agents": {
    "defaults": {
      "sandbox": {
        "mode": "non-main"
      }
    },
    "routing": {
      "marketing": {
        "workspace": "~/.openclaw/agents/marketing/workspace",
        "channels": ["telegram:marketing_bot"],
        "model": "anthropic/claude-haiku-3",
        "sandbox": {
          "allowlist": ["browser", "read", "write", "edit", "cron",
                        "sessions_send", "sessions_list"]
        }
      },
      "dev": {
        "workspace": "~/.openclaw/agents/dev/workspace",
        "channels": ["discord:dev_channel_id"],
        "model": "anthropic/claude-sonnet-4-20250514",
        "sandbox": {
          "allowlist": ["bash", "browser", "read", "write", "edit",
                        "process", "sessions_send"]
        }
      },
      "ops": {
        "workspace": "~/.openclaw/agents/ops/workspace",
        "channels": ["slack:ops_channel"],
        "model": "anthropic/claude-haiku-3",
        "sandbox": {
          "allowlist": ["read", "write", "edit", "browser", "cron",
                        "sessions_send", "sessions_list"]
        }
      },
      "research": {
        "workspace": "~/.openclaw/agents/research/workspace",
        "channels": ["telegram:research_bot"],
        "model": "anthropic/claude-sonnet-4-20250514",
        "sandbox": {
          "allowlist": ["browser", "read", "write",
                        "sessions_send", "sessions_history"]
        }
      }
    }
  }
}
Each entry in routing defines:
workspace— the isolated directory this agent operates inchannels— which messaging channels route to this agentmodel— which LLM the agent uses (use cheaper models for routine tasks)sandbox— which tools the agent is allowed to use
When a message arrives on telegram:marketing_bot, the Gateway automatically routes it to the Marketing Agent's workspace and session. No overlap, no confusion.
Getting Started: Your First Agent Employee
Don't try to build the whole company on day one. Start with one agent:
- Pick your biggest time-sink — probably email management or social media
- Set up a dedicated channel — create a Telegram bot or Slack channel for this agent
- Write its
AGENTS.md— define the role, tone, permissions, and standard operating procedures - Configure sandbox rules — restrict access to only what's needed
- Set up one cron job — give it a daily check-in task
- Use it for a week — observe, refine, adjust
Once that agent is reliably handling its role, add a second. Then a third. Before long, you'll be running morning standups with a team of AI agents, reviewing their work from your phone, and wondering why you ever tried to do it all yourself.
The autonomous company isn't coming. It's already here — and it runs on lobster power. 🦞💪
Have you built an agent company with OpenClaw? We'd love to feature your setup. Tag us @OpenClaw_News on X or share in the OpenClaw Discord.